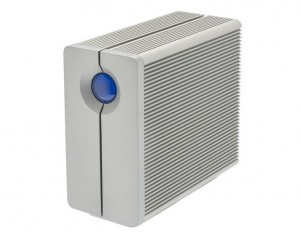
 If you think that LaCie’s latest network attached storage product, the 2Big NAS, looks like something you’ve seen before, you’re right. But beneath the familiar appearance (the basic design of the 2Big has been around since 2007), there are a number of differences under the hood.
The 2Big NAS has a 2GHz ARM processor that, LaCie claims, helps boost read speeds from 60 MBps to 100 MBps. It’s running LaCie’s latest version of NAS OS software which was updated last year to offer more features and make easier to set up and use. The 2Big NAS is also more environmentally friendly, using 90 percent less power in deep sleep mode.
Available without any drives ($299) or with 6TB ($699) of storage, the 2Big NAS has two hot swappable drive bays. Our tests unit was the 6GB version, which shipped as a mirrored RAID with 3GB of available storage capacity. If you prefer, you can set up the 2Big NAS as a striped RAID 0 array, which will give you access to 6TB of storage, but without the safety of redundant drives. It has eSATA and USB 2.0 ports for adding capacity.
The 2Big NAS comes with Intego Backup Manager Pro for Mac and supports OS X’s Time Machine, as well as Windows Backup. The 2Big NAS also offers print server capability for allowing access to supported USB printers to all computers on the network.
Setup
The initial setup was pretty easy. Simply plug the 2Big NAS into your network router and install the included LaCie Network Assistant software on your Mac. It was simple to load the preconfigured Public share or to create one of your own.
Creating the MyNas share for remote access wasn’t quite as simple. Naming the share is quite easy; just pick a name for the server and it’s available as mynas.lacie.com/yourname. But the automatic setup didn’t work for me and an error message suggested that I needed to open a port on my router without giving much in the way of instruction. I was able to get MyNAS to work after adjusting the settings, and once configured, I could use the MyNAS iOS app to connect to the 2Big NAS remotely and play songs and view photos on the 2Big NAS on my iPhone 4.
The iOS app is not terribly elegant, showing lots of normally hidden folders, such as .AppleDB, .AppleDesktop, and .DS Store, and they clutter up the view of your files. You can upload photos from your iOS device’s Camera Roll to the 2Big NAS or use the app to take and upload photos directly using your device.
Support for Apple’s Time Machine is not enabled by default and you can’t turn it on using the LaCie Network Assistant software. To enable the feature you need to go to the browser-based Dashboard, go to Settings, and click on the little tool icon to turn on the service. Then you go back and select the volume you want to use, click on the little Protocols button, and then turn on Time Machine. Once enabled, I was able to backup my Mac to the 2Big NAS and successfully revert to versions of files backed up on the device.
In use
In our performance tests, the 2Big NAS was an average performer, writing a 10GB file at 40.6 MBps, and reading that same file at 71.6 MBps. It was slower when handling a 10GB folder full of smaller files and folders, writing at just 12.7 MBps and reading at 34.7 MBps.
One thing I noticed was the noise made when the NAS was working. At first I thought it was a drum track playing on the radio we had quietly playing in the lab, but it turns out to be the churning sounds of files being written and read. I know its not meant to be sit on someone’s desktop, but you’ll want to consider placing this somewhere out of earshot.
Buying advice
While not the fastest NAS device we’ve tested, the LaCie 2Big NAS was fairly simple to use and offers nice variety of features, including remote access using a browser or the LaCie MyNAS iOS app.


